Carbon filter: Difference between revisions
m (→Steps: typos) |
m (Corrected links to fan parts) |
||
| Line 15: | Line 15: | ||
2. 3D print parts |
2. 3D print parts |
||
| − | * [https://cannawiki.net/ |
+ | * [https://cannawiki.net/wiki/images/c/cb/Filter_chamberv2.3mf Filter chamber] |
| − | * [https://cannawiki.net/ |
+ | * [https://cannawiki.net/wiki/images/2/2f/Filter_chamber_lid.3mf Filter chamber lid] (print on 0.1 layer height) |
| − | * [https://cannawiki.net/ |
+ | * [https://cannawiki.net/wiki/images/6/69/Filter_filler.3mf Filler tool] (optional, to make filling the chamber easier) |
| − | * [https://cannawiki.net/ |
+ | * [https://cannawiki.net/wiki/images/4/4b/Screw_thread.3mf Screw thread] |
| − | * [https://cannawiki.net/ |
+ | * [https://cannawiki.net/wiki/images/7/7d/Fan_case_top.3mf Fan case top] |
| − | * [https://cannawiki.net/ |
+ | * [https://cannawiki.net/wiki/images/5/53/Fan_blades.3mf Fan blades] |
| − | * [https://cannawiki.net/ |
+ | * [https://cannawiki.net/wiki/images/c/ce/Fan_case_bottom.3mf Fan case bottom] |
Revision as of 19:27, 17 October 2023
Typically, in indoor grows, the smell produced by a flowering plant is undesirable to have outside of the growing environment, this has spurred the invention of filters utilizing activated carbon to absorb this odor.
Open source filters

120mm PC fan conversion kit

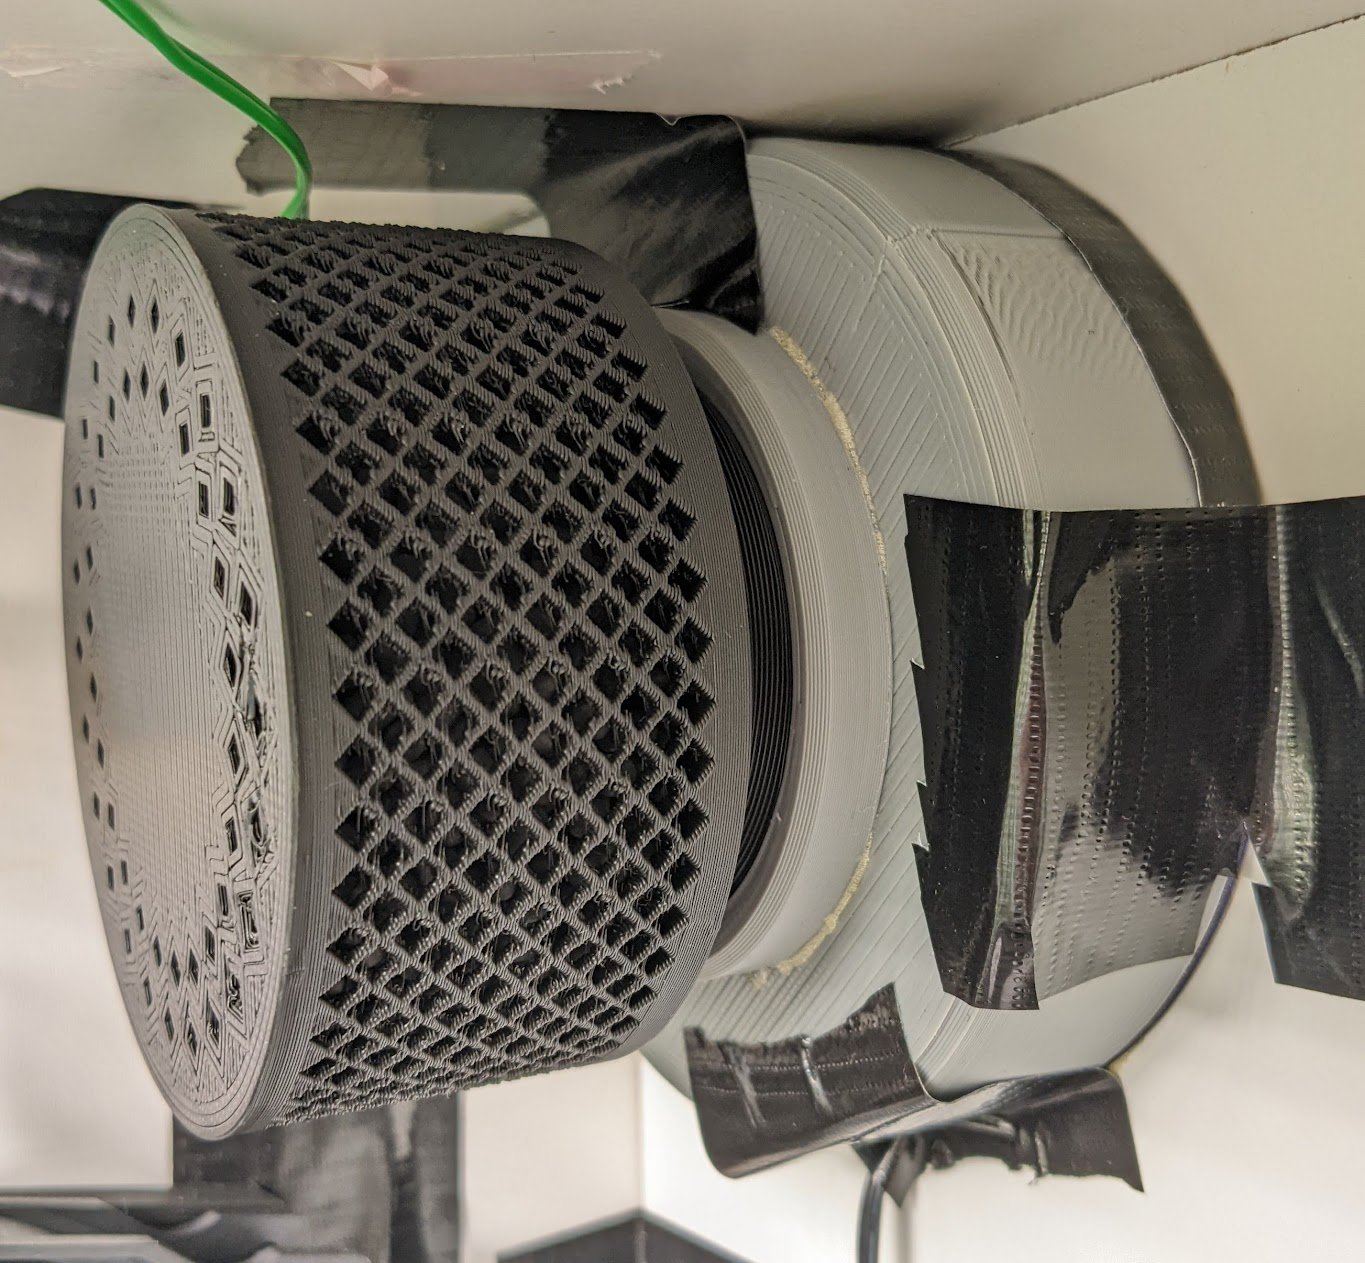
This fan is designed to be 3D printed and used as an exhaust fan with a filter using activated carbon pellets.
Steps
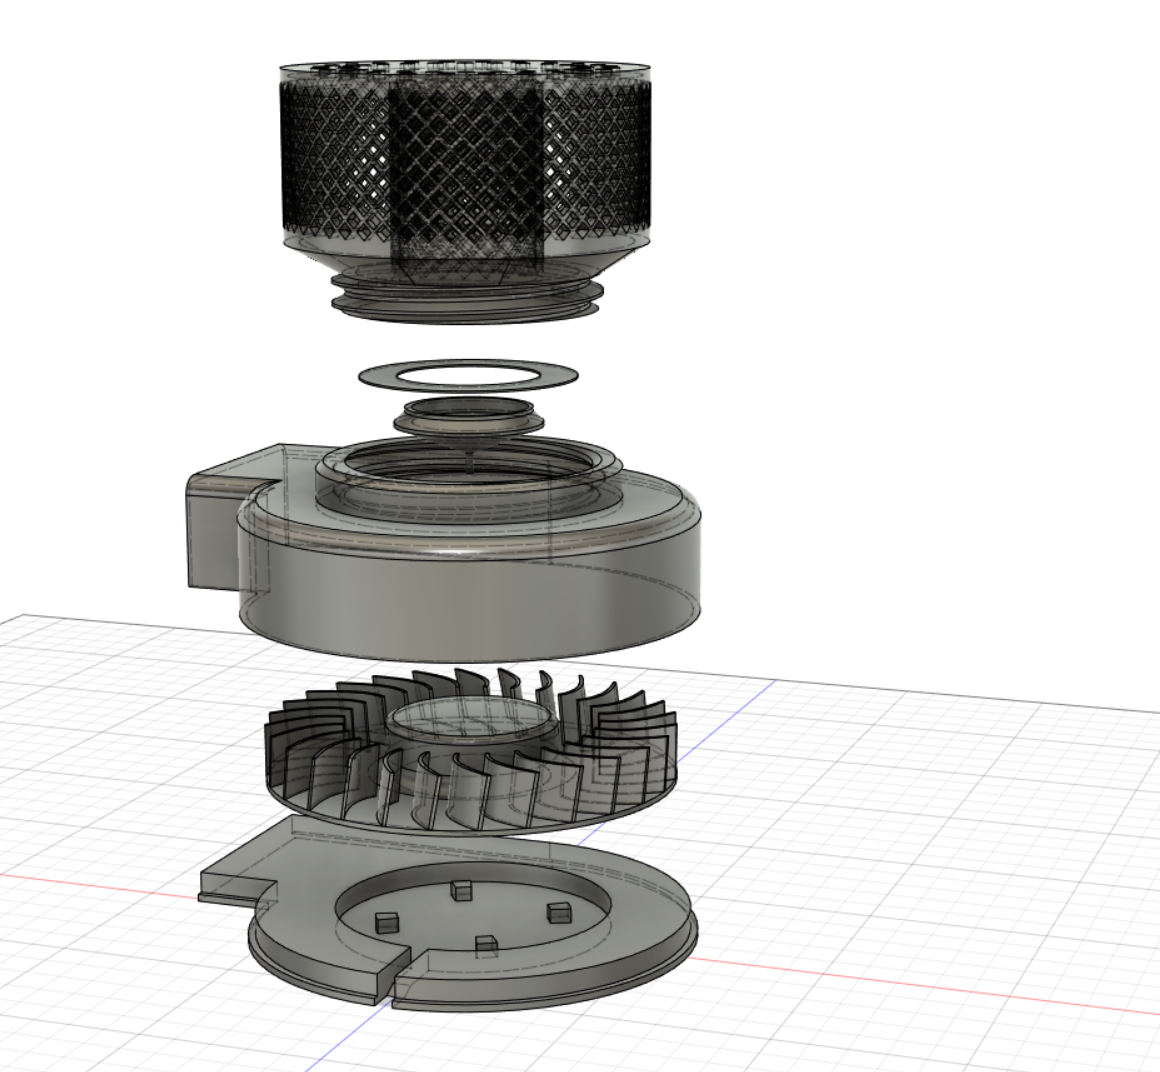
1. Take a standard 120mm PC case fan and remove the power cable from the frame of the fan. Cut the motor out of the frame with snips or a saw. Next, remove the fan blades from the fan hub. You may have to sand down the hub of the fan to remove the stubs of the fan blade.
2. 3D print parts
- Filter chamber
- Filter chamber lid (print on 0.1 layer height)
- Filler tool (optional, to make filling the chamber easier)
- Screw thread
- Fan case top
- Fan blades
- Fan case bottom
3. Glue the screw thread to the case top model so that it aligns with the hole and leave it to dry.
4. Glue the motor from the fan in the center of the fan case bottom. The stubs around the center should help to line it up. The cable should exit the fan case from the bottom.
5. Glue or press fit the fan blades onto the hub. Make sure the old fan blades are really removed from the hub, sanding will help.
6. Place the case top onto the assembled fan and seal around the edges with tape.
7. To fill the filter chamber with carbon pellets place the filler tool in the cavity of the filter chamber. The filler tool is just there to stop the pellets from getting into the central cavity.
8. Remove the filler tool and put the chamber lid in the mouth of the filter chamber. It should be flexible enough to bend into place under the tabs on the inside of the screw.
9. Screw the filter chamber onto the fan body. Unscrew and replace the carbon pellets every 6 months or when the filter becomes ineffective.